SOFTWARE
DEVELOPMENT
Creating and managing attributes.
The button or menu displays an overview of all attributes:
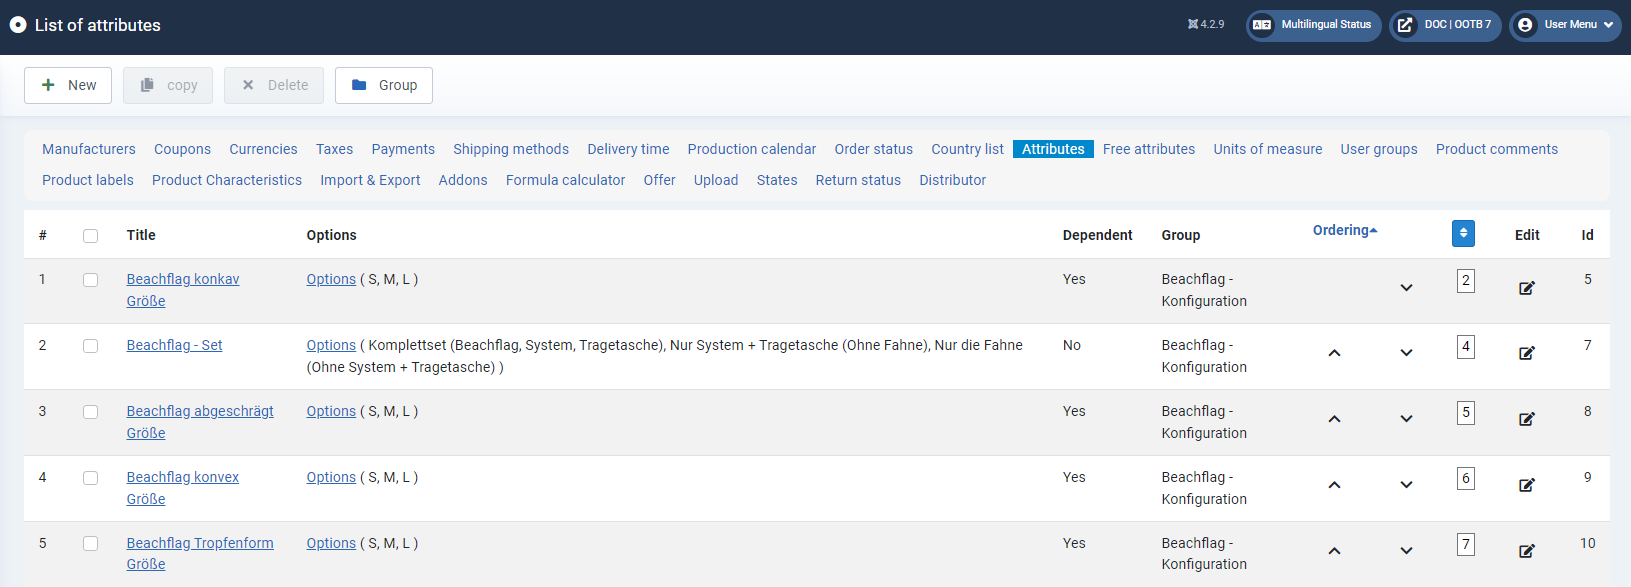
To create a new attribute, click on the +New button.
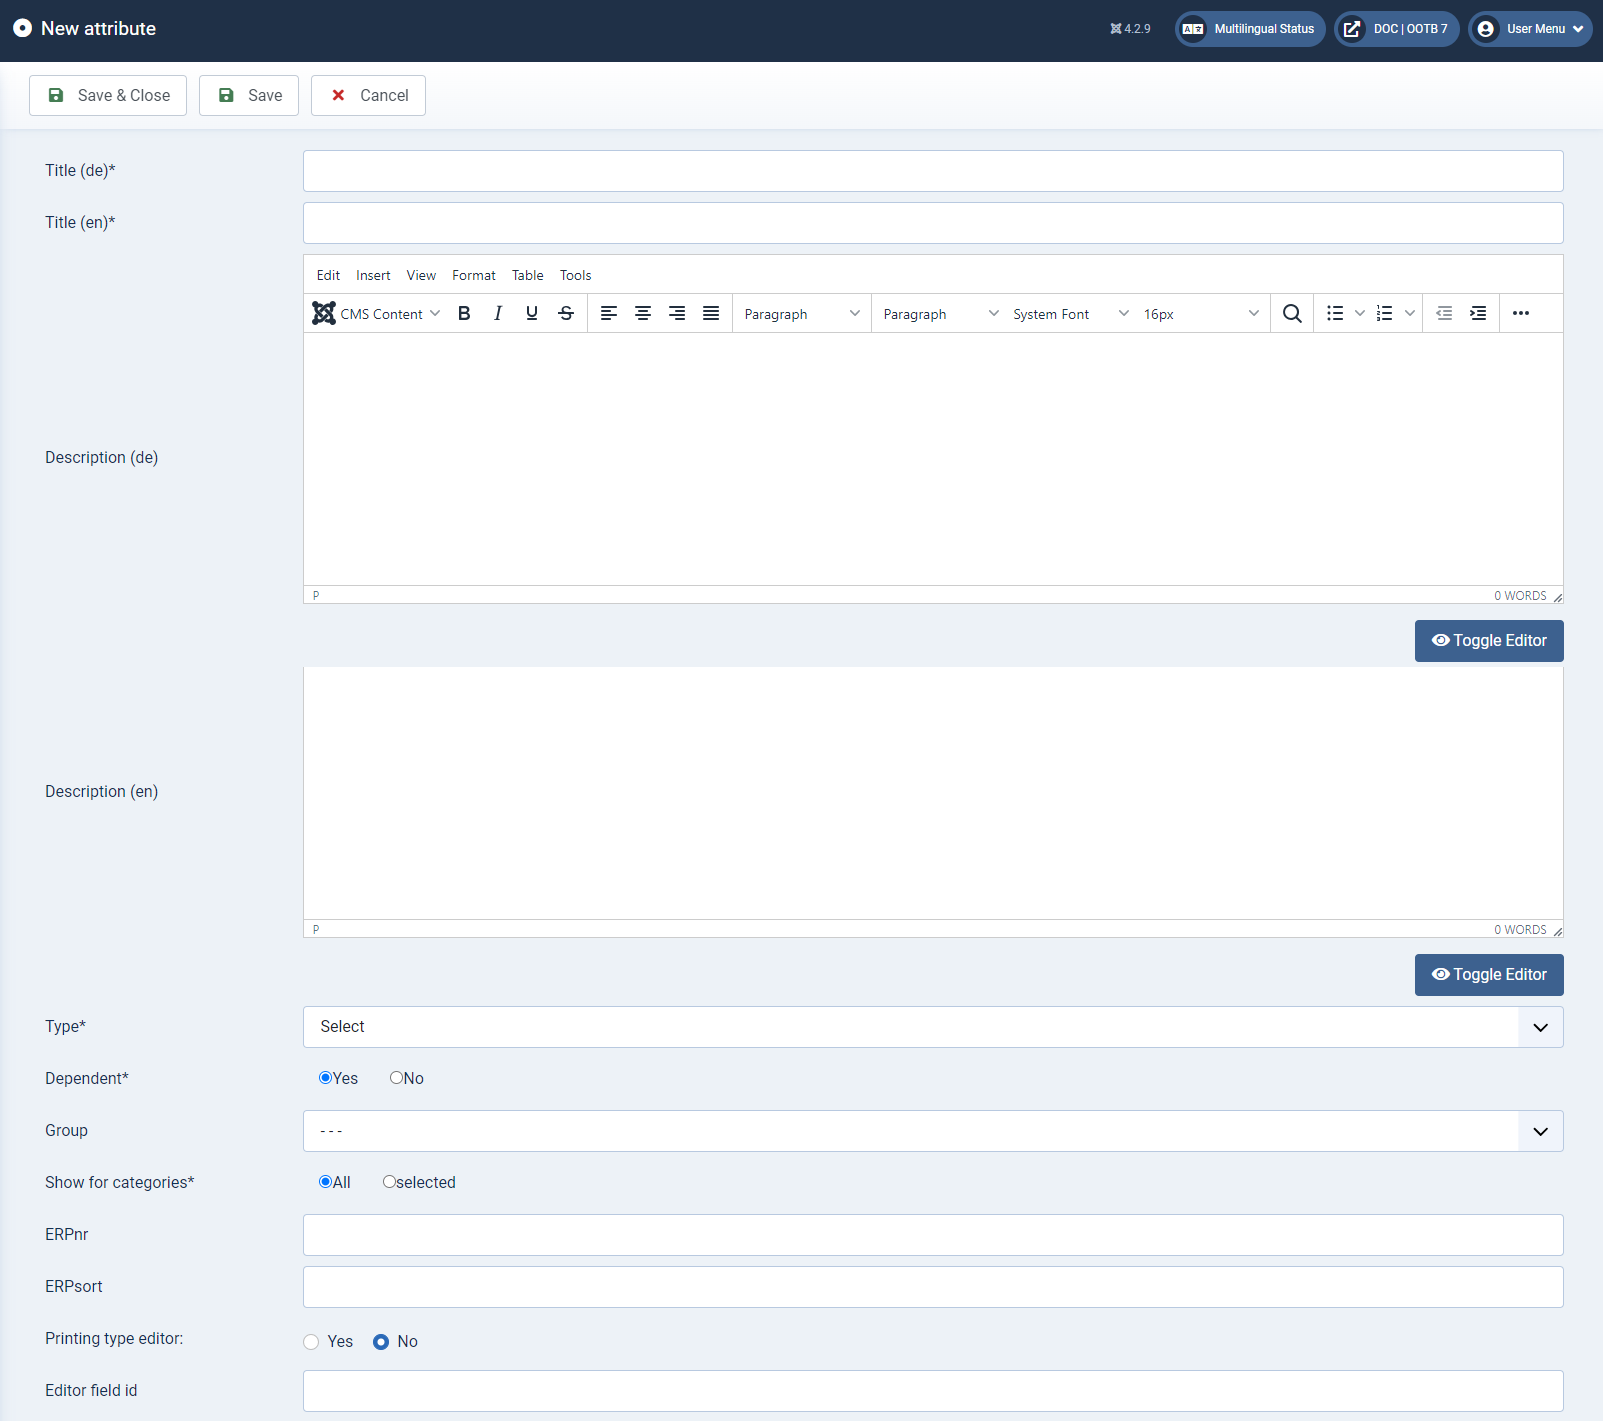
Fill the input fields
Title* (mandatory field)
The title must be entered as a mandatory field for all languages in order to be able to save a new attribute.
Description
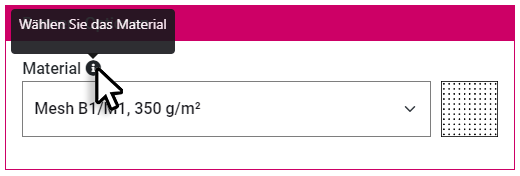
You can describe the attribute here. You can enter a separate description text for each language created (only one text should be entered).
In the frontend, an info symbol appears next to the title of the attribute and the text is displayed as a pop-up after hovering over the info symbol with the mouse pointer:
Type* (mandatory field)
Select the type of attribute: Select, Radio or Hidden. This is how you determine the display form of the attribute.
Dependent* (mandatory field)
Specify whether the attribute is a dependent attribute.
Group
To group attributes, you can assign them to a group here. This group must first be created in Gpoups. You can open the list of the groups using the "Goup" button:
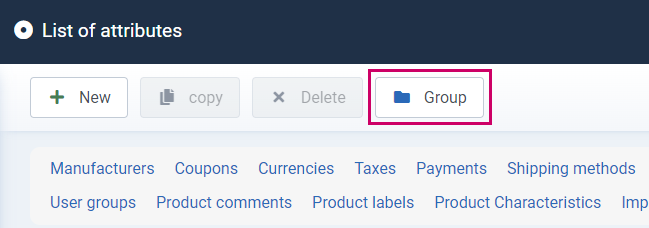
in the attribute overview. To do this, click on +New and enter a group title for each language. After saving & closing, you will see the overview of the groups.
By clicking:
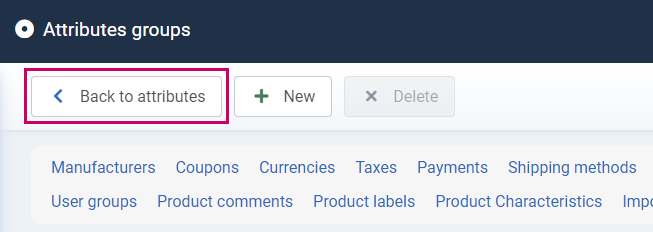
you can go back to the overview of attributes.
Show in category* (mandatory field)
Here you can select the desired categories where the attribute should be displayed.
Once you have entered all the relevant data, click on Save & Close to create the attribute and return to the overview.
You can manage all existing attributes using the buttons displayed there.
To do this, you must select the relevant attribute using the checkbox.
To add options to the newly created attribute, please click on Options in the corresponding line and on +New on the next page.
Fill in the input fields:
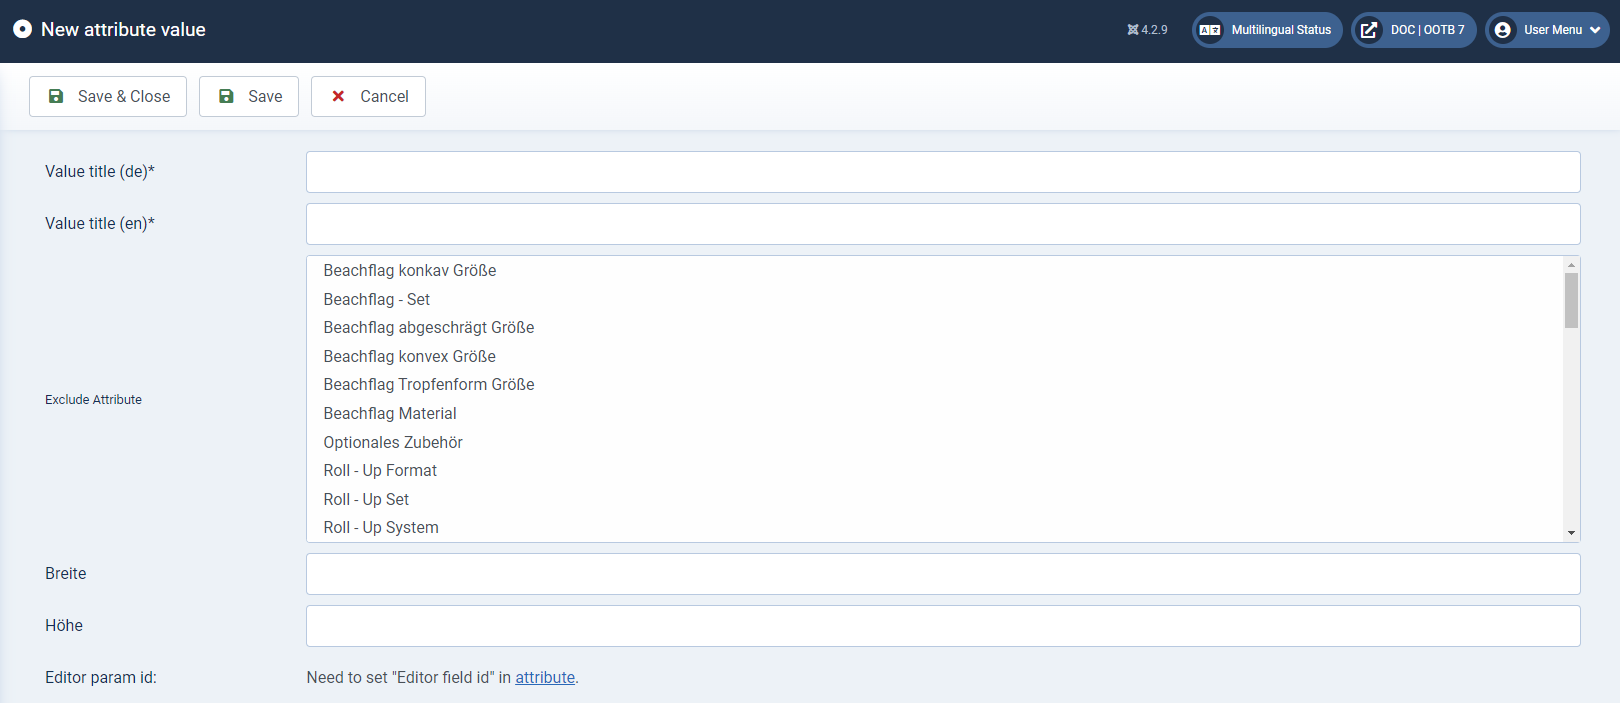
In addition to the value names in all created languages, you can upload an image or exclude attributes, or their options.
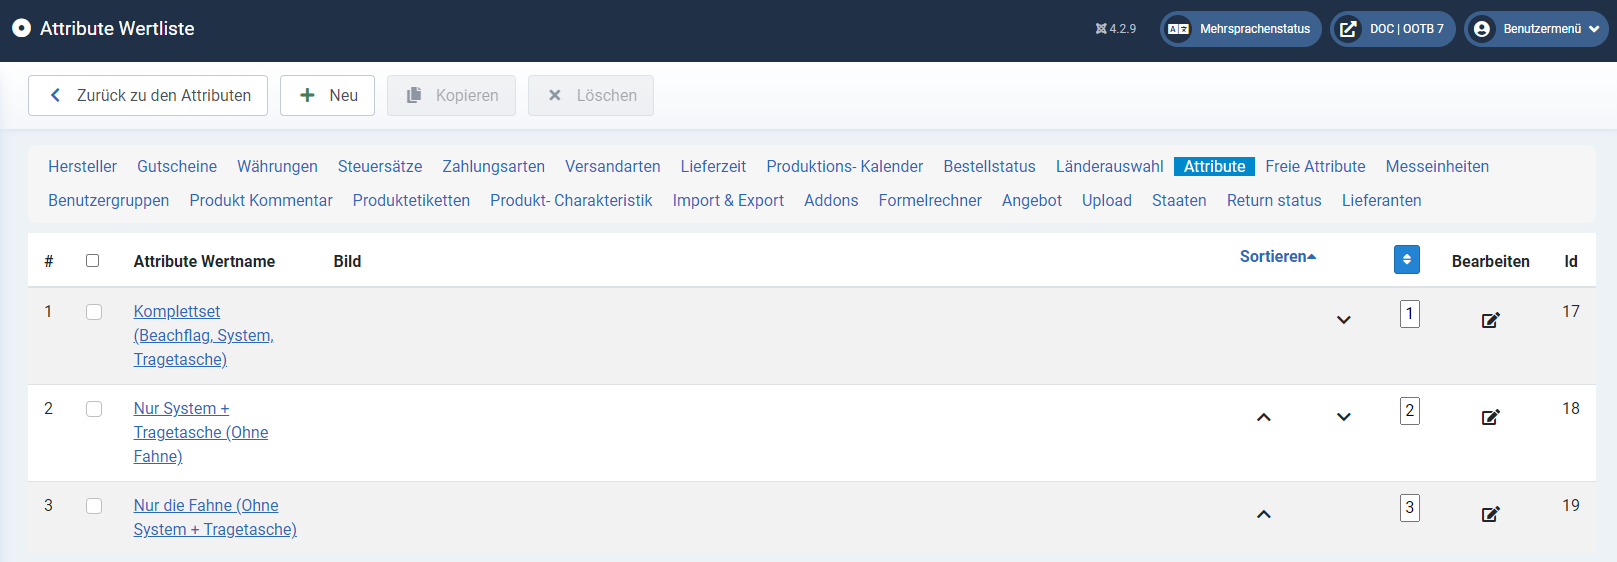
Options that have already been created can be deleted, copied or edited.
Width / Height
Values can be stored in these fields which are to be transferred to the editor by selecting the corresponding attribute option or which can be used for e.g. price calculation according to square metres or other dynamic price calculations.
Editor param id:
The attribute option must first be saved for the field to become active. The ID of an editor field that is to be linked to the attribute option can then be entered here.
Exclude Attribute
In this window, you can mark options that should be excluded when selecting this option. This is useful when calculating certain products to close options that are logically mutually exclusive or cannot be combined
Save the option by cklicking Save or Save & Close. The newly created option is then displayed in the overview:
")
")