SOFTWARE
DEVELOPMENT
In this section you will learn how to integrate Adobe Stock into your editor
1. Visit https://console.adobe.io/integrations and log in with your data.
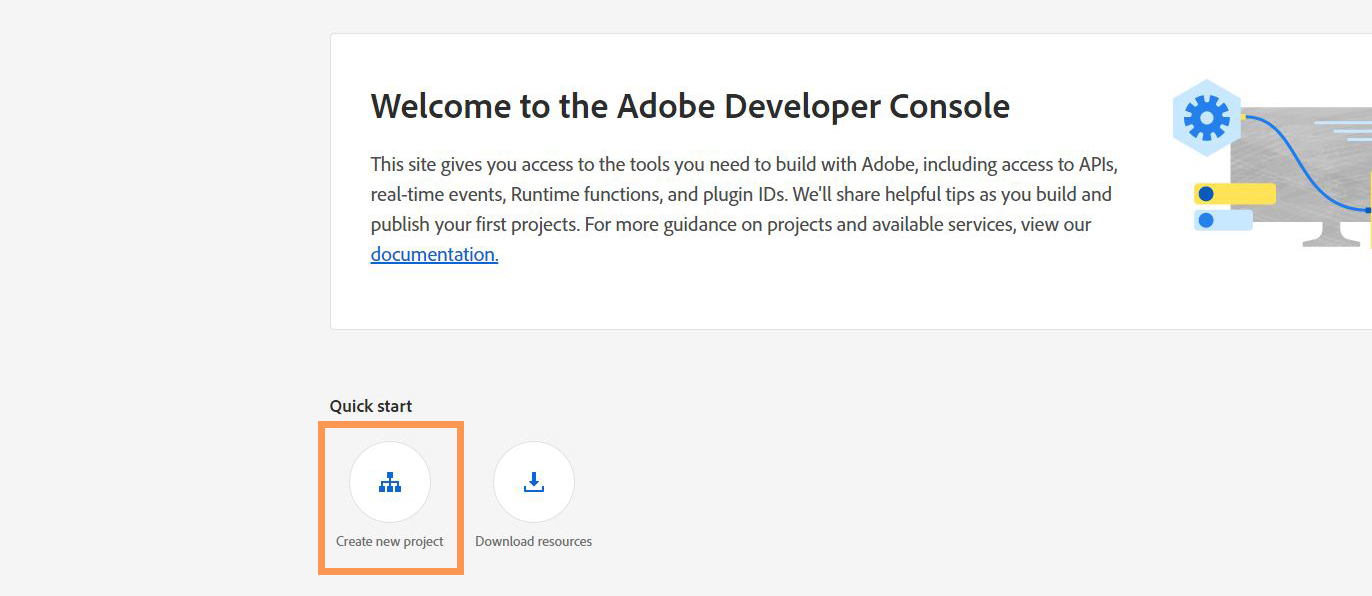
1.1 Create a new project by clicking on "Create new project":
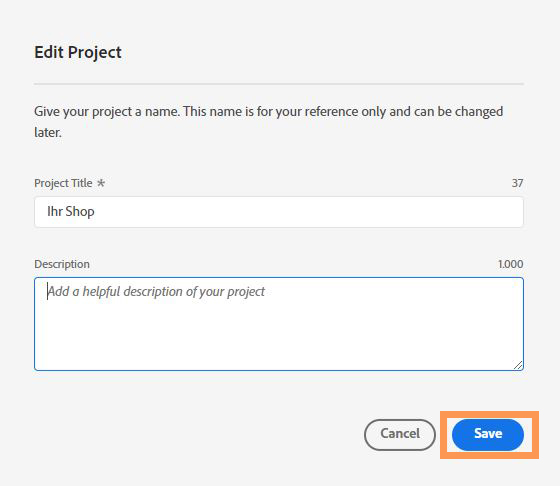
2.1 By clicking on "Edit Project" in the upper area on the right, you can open a window in which you can change the name and description of the project:

2.2 Enter your data and save it by clicking on "Save":
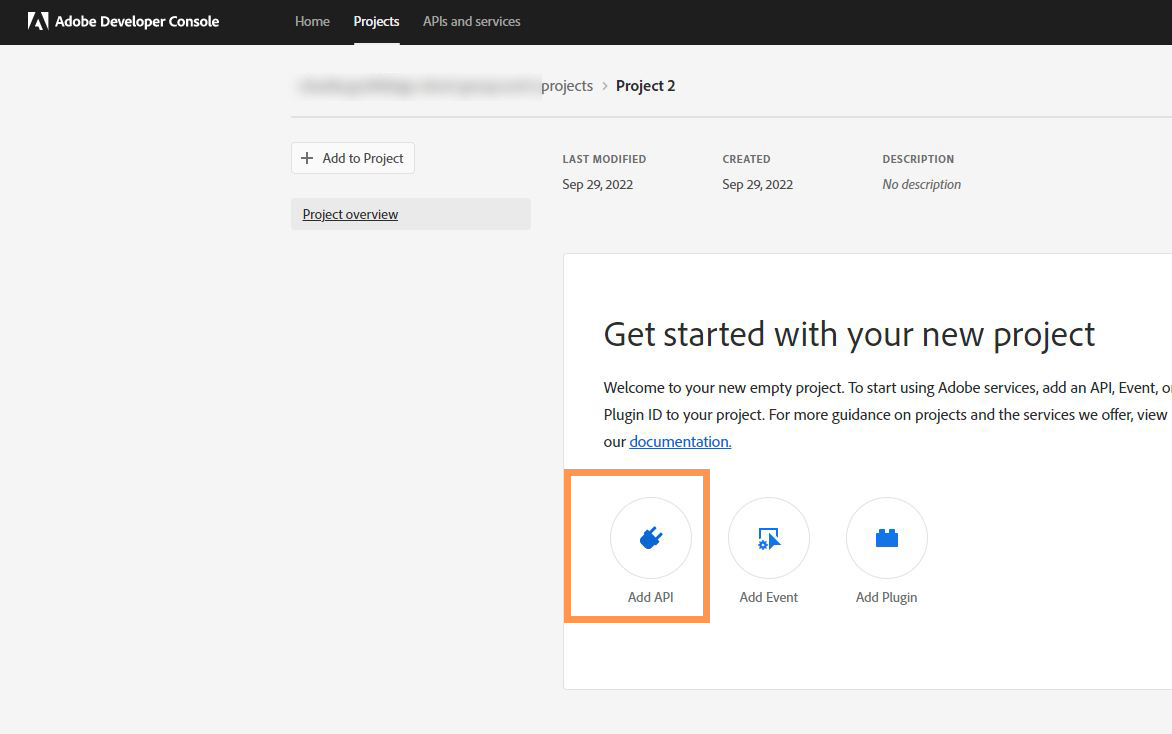
3. now click on "Add API":
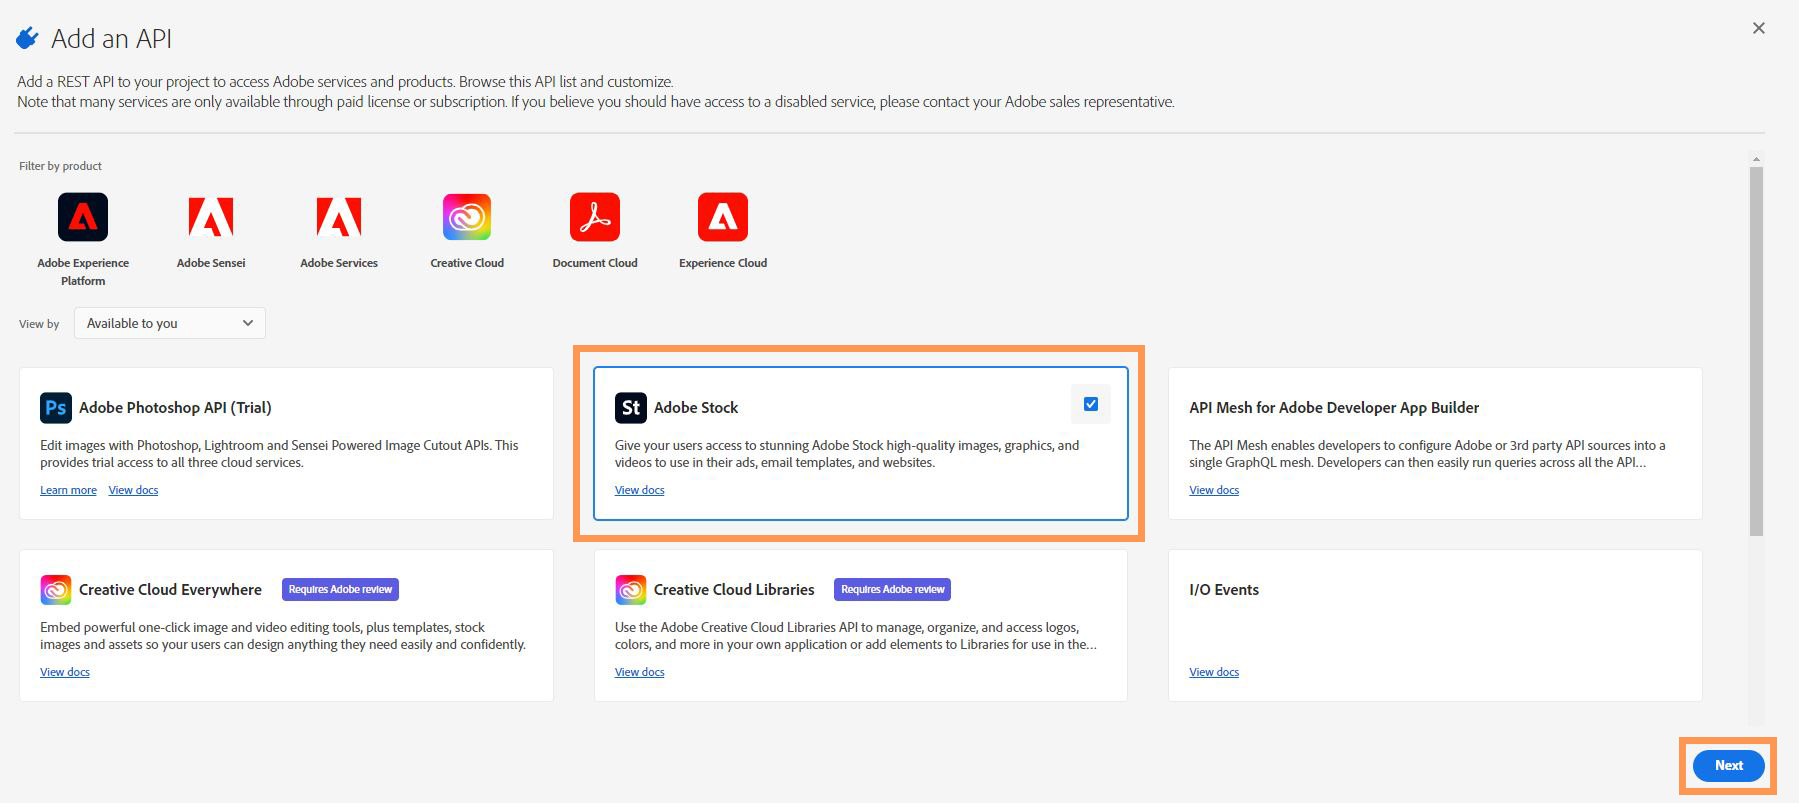
3.1 Select "Adobe Stock" and click on "Next":
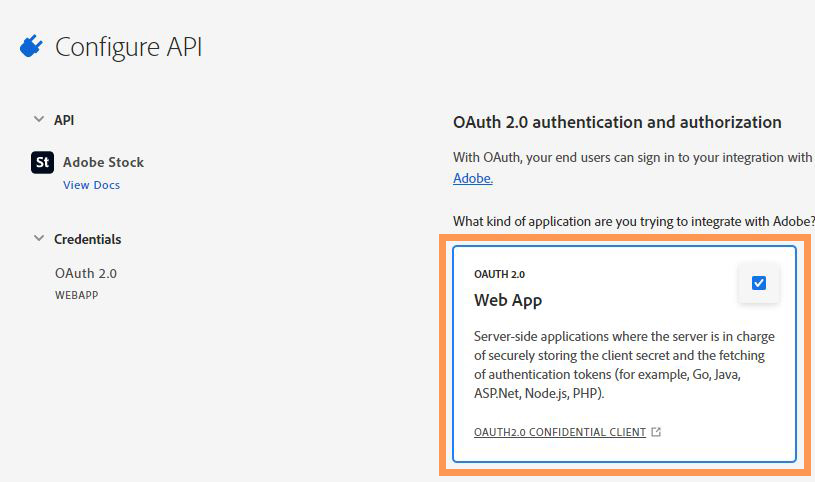
4. Select OAUTH 2.0 - Web:
4.1 Now fill in the following fields..:
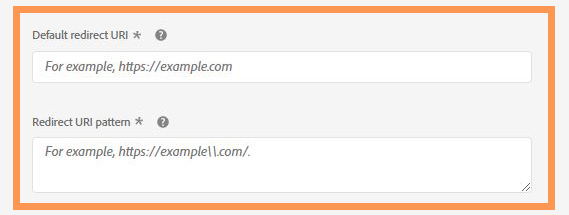
The redirect URIs are composed according to the following pattern:
(Pay attention to the correct placement of the dots and slashes)
Default redirect URI:
/administrator/index.php?option=com_expresseditor&controller=adobe_stock&menu=menu_images&task=adobe_stock
Redirect URI pattern:
administrator/index.php?option=com_expresseditor&controller=adobe_stock&menu=menu_images&task=adobe_stock
ATTENTION: If you use a subdomain that contains one or more points, e.g:
/administrator/index.php?option=com_expresseditor&controller=adobe_stock&menu=menu_images&task=adobe_stock
a "\" must be placed before the ".":
administrator/index.php?option=com_expresseditor&controller=adobe_stock&menu=menu_images&task=adobe_stock
4.2 Klicken Sie auf "Next"
4.3. Klicken Sie im nächsten Fenster auf "Save configured API"
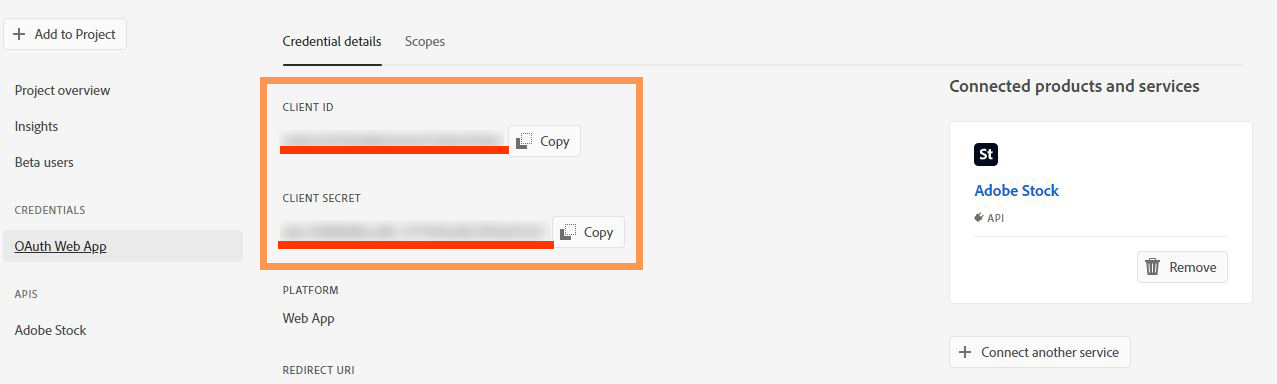
5. Kopieren Sie sich aus der darauf folgenden Übersicht die Schüssel CLIENT ID und CLIENT SECRET.:
4.2 Click on "Next"
4.3 In the next window, click on "Save configured API".
5. copy the CLIENT ID and CLIENT SECRET keys from the following overview:
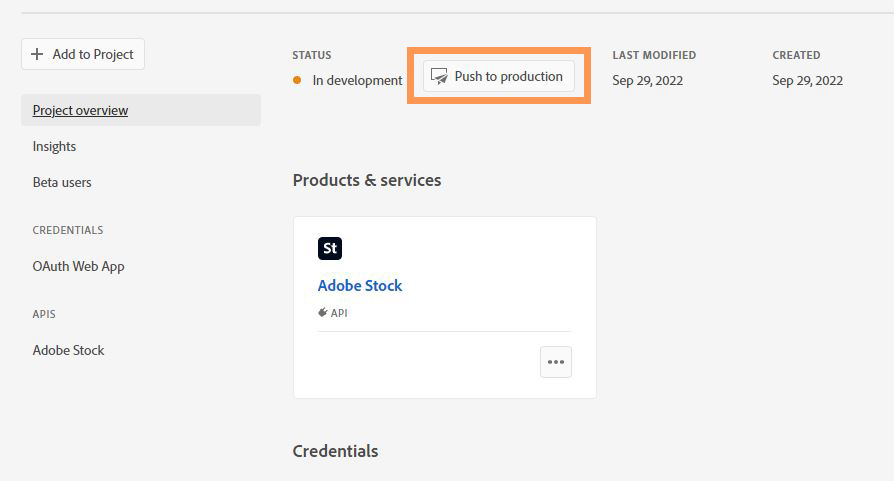
6. For the API connection to work, the status must be changed from "In deveopment" to "Production" in the "Project overview" by clicking on "Push to Production":
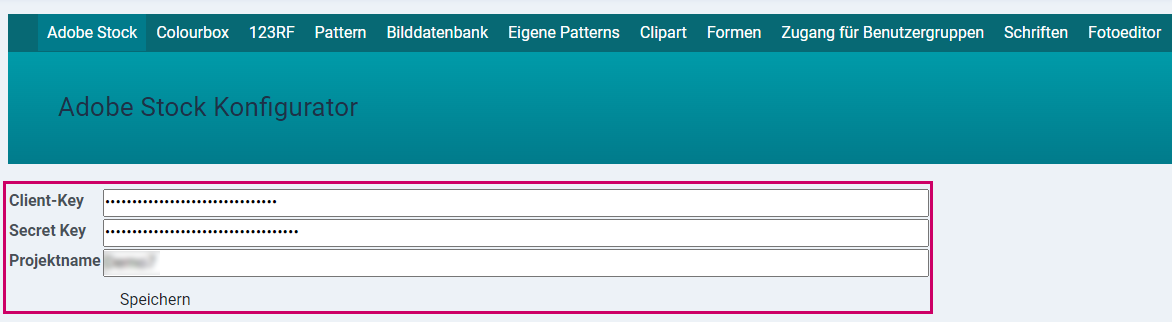
7. now go to the store under: smart|EDITOR > Images and fonts.
7.1 Paste the previously copied key and the project name into the corresponding fields.
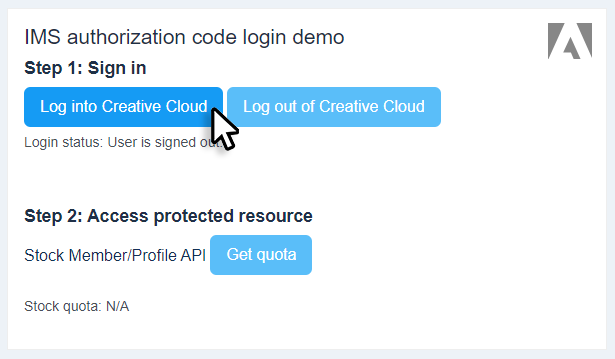
8. Click on "Log into Creative Cloud" and you will be redirected to the Adobe authentication page.
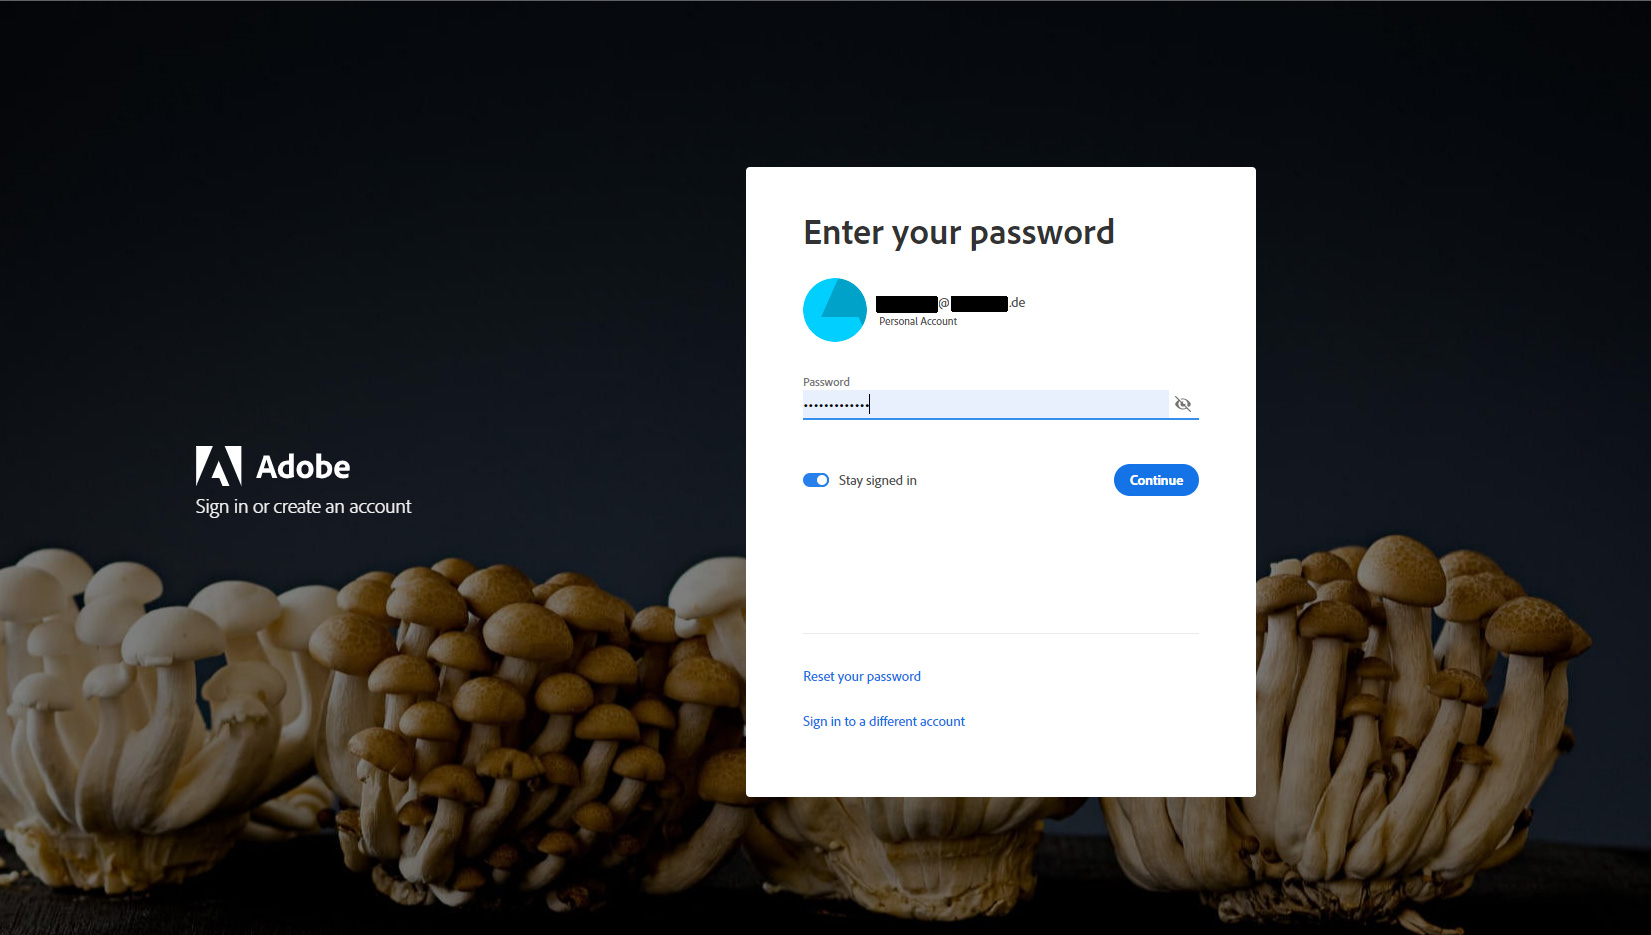
9. log in to Adobe with your access data.
[ATTENTION]: If you have several Adobe profiles, make sure that you log in with the profile under which you created the project.
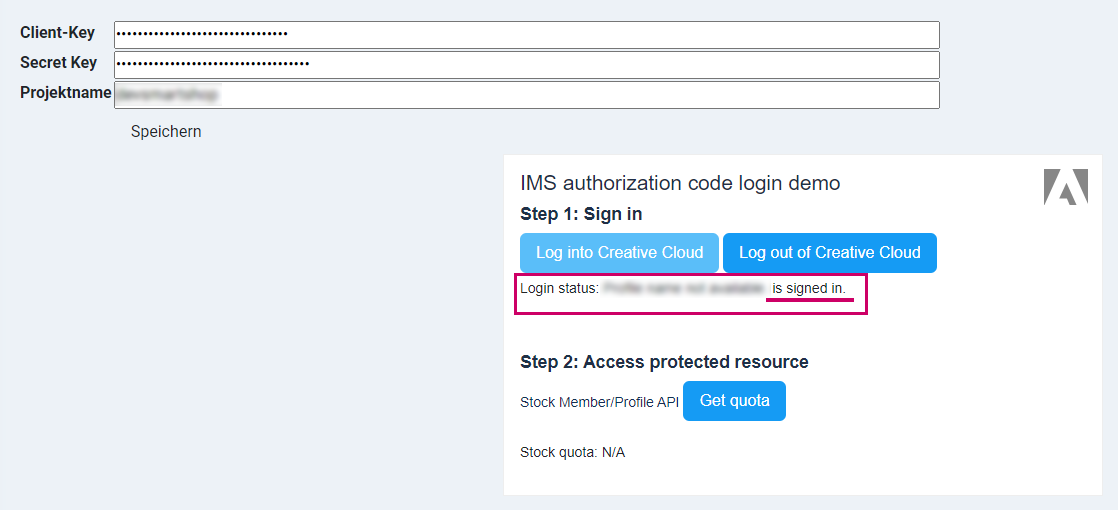
10. After successful login, the login status changes to "signed in" and the Adobe Stock connection is complete.
IMPORTANT:
Check in the respective editor under the "Image databases" tab whether the image archive is activated. You can recognize this by the active tick next to the corresponding image archive:
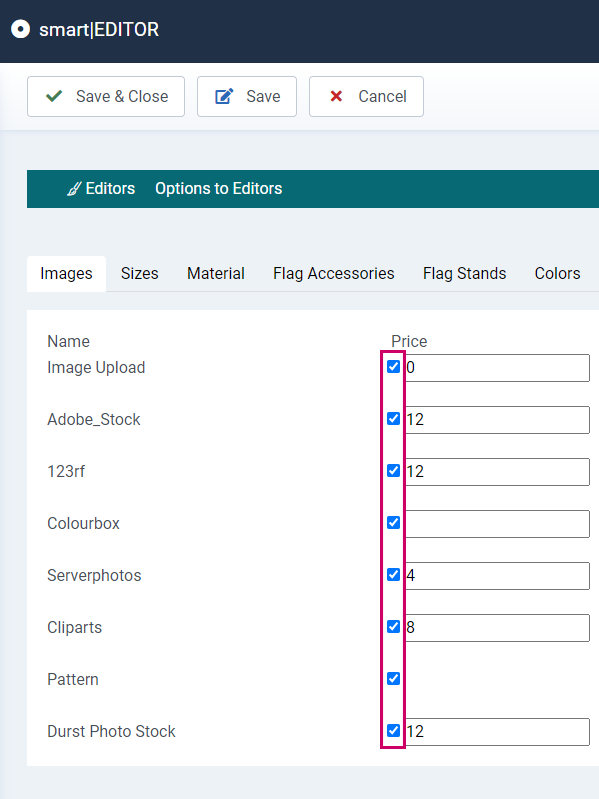
Check the box and save the settings.
Your image database is now activated.
")
")