SOFTWARE
DEVELOPMENT
Implementing Square payment system in your SmartSHOP:
1. Log in with your Square account at: https://developer.squareup.com and go to the developer dashboard under the Account button:

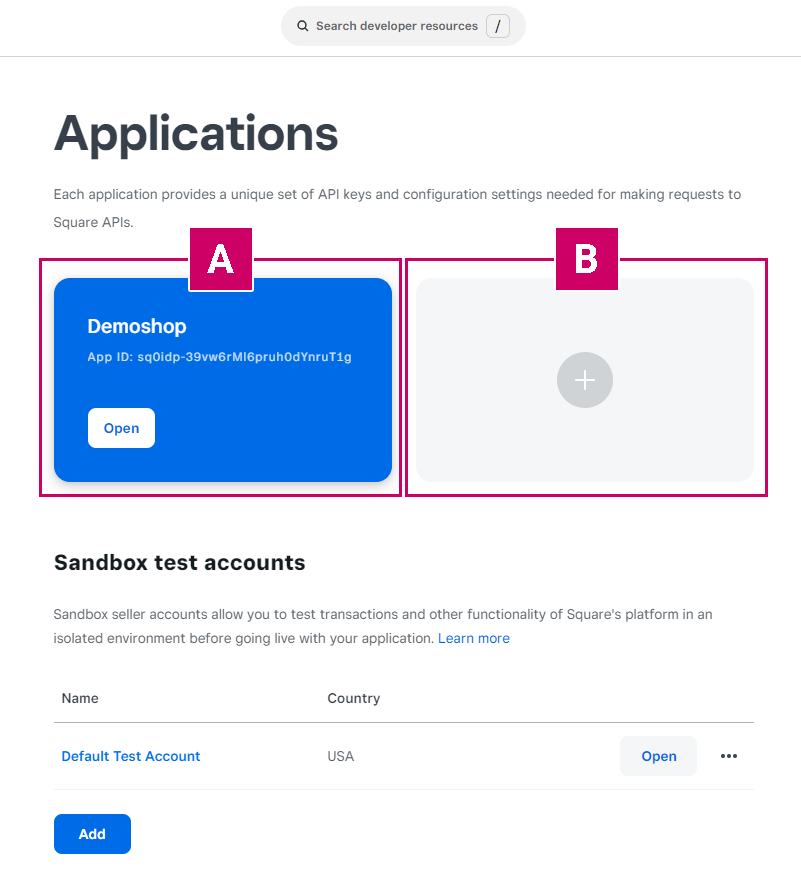
1.2
[A] Click into the application you have already created.
[B] Create a new application:
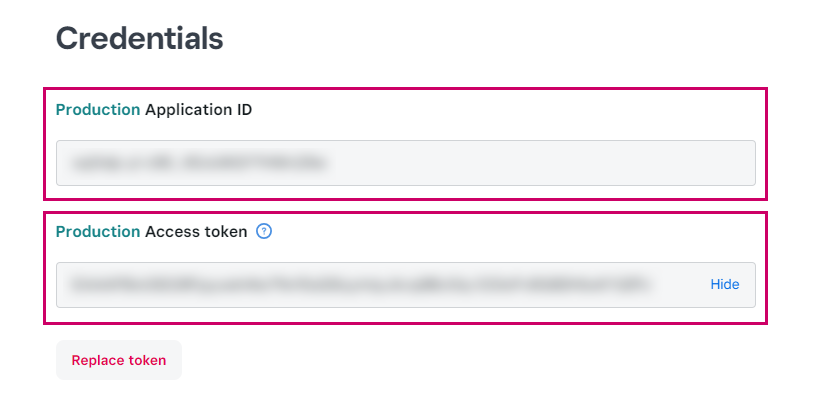
1.3 The credentials can be found in the overview of the application, there you can choose between Sandbox and Production:

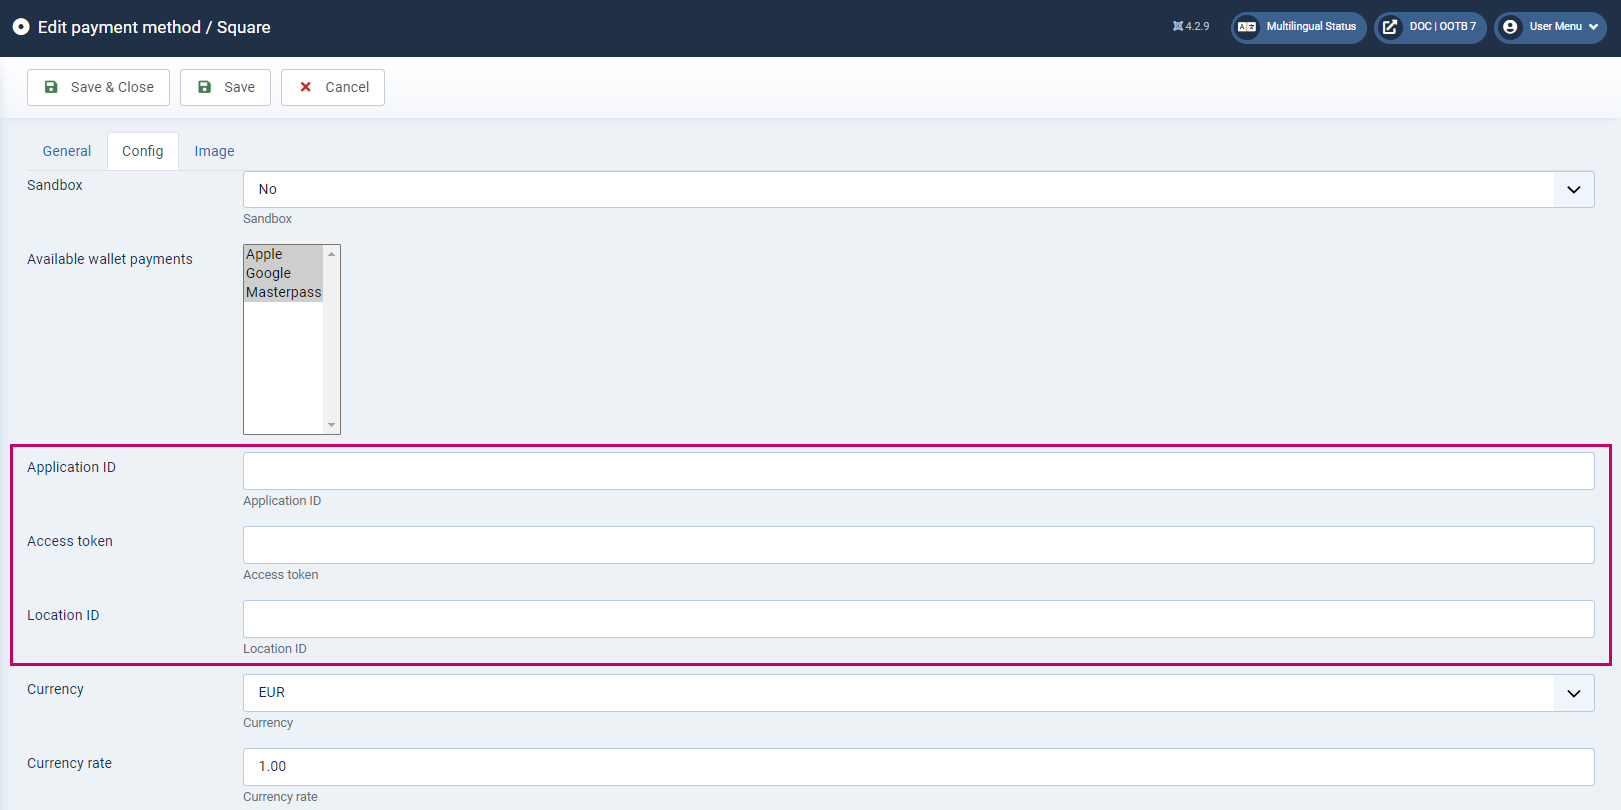
1.4 Directly below you will now see the Application ID and the Access token
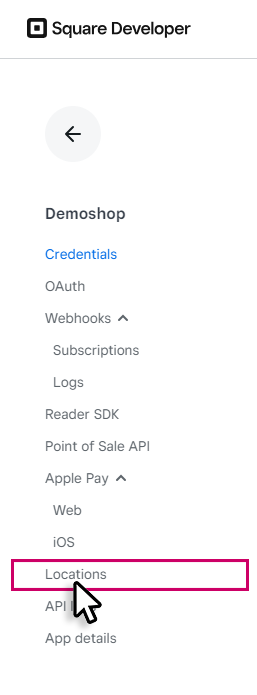
1.5 For the connection in the store the location ID is needed, you can find it by clicking on Locations in the menu on the left:
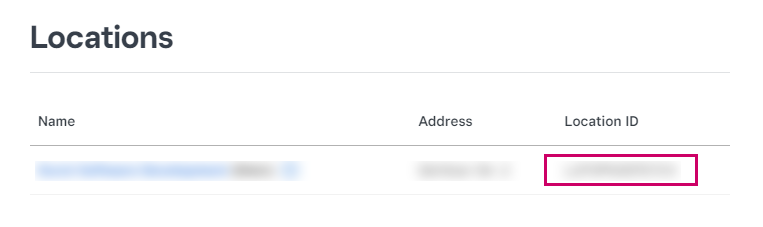
1.6 Here you can copy out the Location ID
2. Open: smartSHOP > Options > Payment systems > Square in the overview of payment systems. (If the plugin is not yet installed in your shop, please contact our project management team).
2.1 Open the Square settings by clicking on the title or on:
in the "Edit" column.
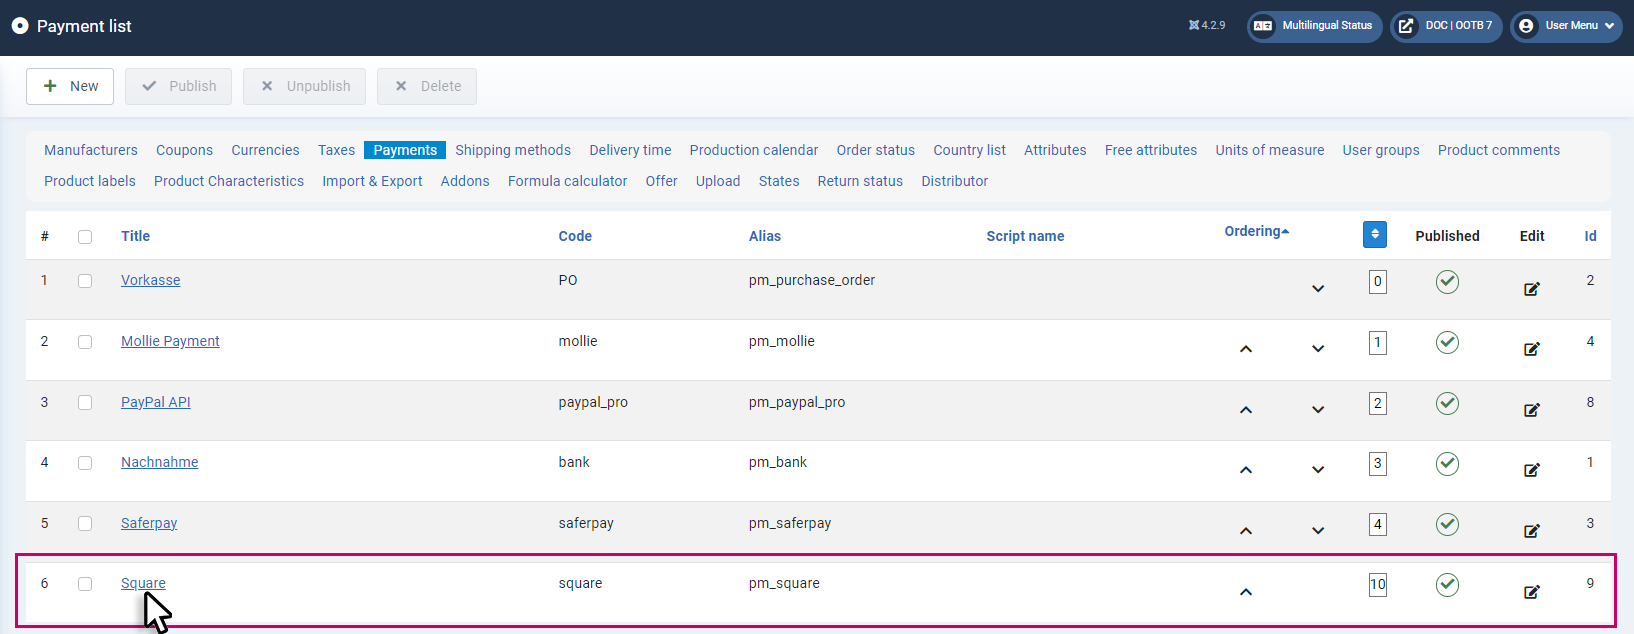
2.2 In the Config tab, you can enter the data for the connection.
Sandbox
Here the test mode is switched on and off.
Important: If you want to use the test mode, separate access data is required here.
Available wallet payments
Here you can offer the customer the possibility to use a virtual wallet. By holding down the Ctrl key and clicking the mouse, you can select and deselect the following options
Application ID
Enter the Application ID from the Square backenn here (step 1.4)
Access token
Enter the Access token from the Square backend here (Step 1.4)
Location ID
Enter the Location ID from the Square backend here (Step 1.6)
Currency
Set the currency here
Currency rate
Here you can enter the exchange rate
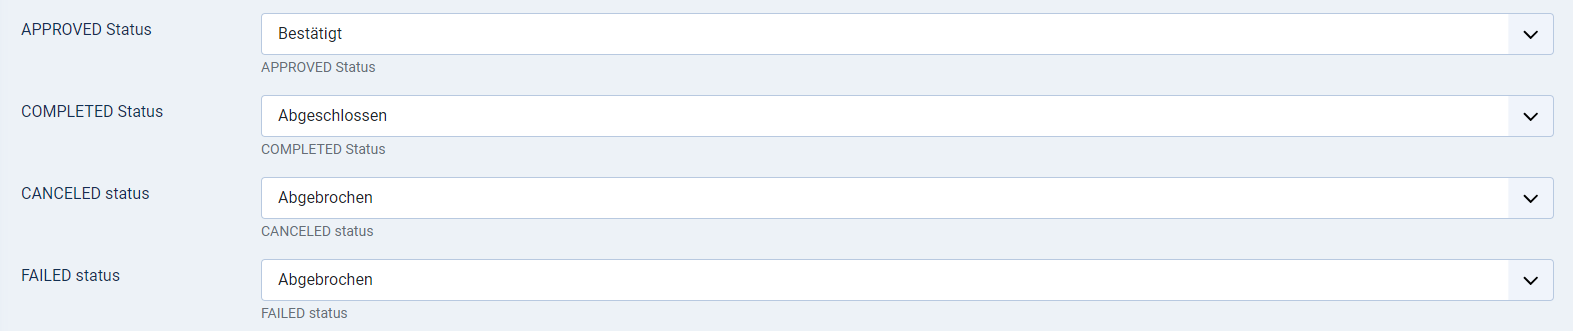
2.3 Below you can change the status assignment of the order in the store which should be triggered by the respective statuses of Square. (However, it is recommended to keep the statuses in the default settings).
Click Save & Close to save the settings.
")
")